Setting up a third-party router with AT&T Gateway with IP Passthrough
About two weeks ago, I had bought a TP-Link router to use for my home network. The problem was… I have AT&T as my ISP Internet Service Provider - A company who sells you access to the internet . Despite the fact that many (including me) associate AT&T routers with being very restrictive, not allowing you to change many settings, this process was more or less surprisingly simple and straightforward. Here’s how I did it!
Note: This guide applies to the AT&T BGW320-500 fiber modem/router combo. You may have trouble following along if you use a different generation device.
What is IP Passthrough
IP Passthrough on AT&T Gateways is a feature that allows your Gateway to act as a tunnel, disabling its built-in firewall A security system that monitors and controls incoming and outgoing traffic on a network, blocking unauthorized access , and assigning its WAN (public) address to a single LAN device.1
On the other hand, there is also DMZplus and Bridge mode, but I will not be discussing those as the BGW320-500 doesn’t support them AFAIK As Far As I Know .
Why IP Passthrough?
Because the BGW320-500 doesn’t support the superior Bridge mode, we must use IP Passthrough. With Passthrough, we can avoid a situation known as “double-NAT”, which happens when your third-party router is connected behind your AT&T Gateway, slightly increasing latency, and may cause issues with online gaming, port forwarding, etc. Don’t ask me to elaborate… because I don’t know.
Prerequisites
- A third-party router: Something snazzy that’s compatible with your gateway (NETGEAR, TP-Link, ASUS, you get the picture)
- Your router’s Access Code.. You’ll need it later on to bribe– I mean, persuade the Gateway into letting you change the settings
- Ethernet cables: Two, one for your computer to the Gateway, and one for the Gateway to your new router
Note: Before you start, disable Wi-Fi on your AT&T Gateway. Trust me… (Link to router page)
Setting Up
After you have your equipment ready, we can begin.
- Plug in and turn on your third-party router. As it powers on, connect an Ethernet cable from one of the LAN ports of your AT&T Gateway into the port labelled “WAN” on your third-party router.
- Note: Connect your computer to the AT&T Gateway via Ethernet too. It’ll make it easier to configure it.
- Open your AT&T Gateway web portal. It should be http://192.168.1.254 by default.
- Navigate to the
Firewall > IP Passthroughtab (Link). You will need to enter your Access Code to open the IP Passthrough settings.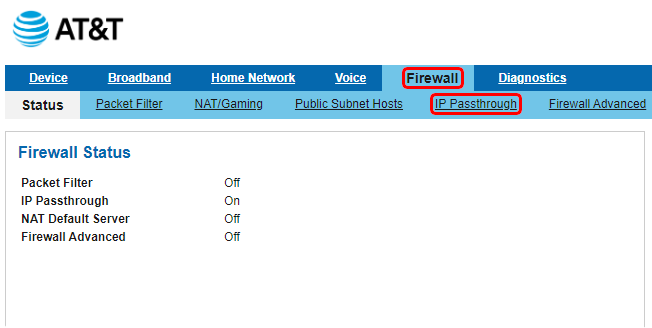
- After you enter your Access Code and open the IP Passthrough page, you will be presented with this page:
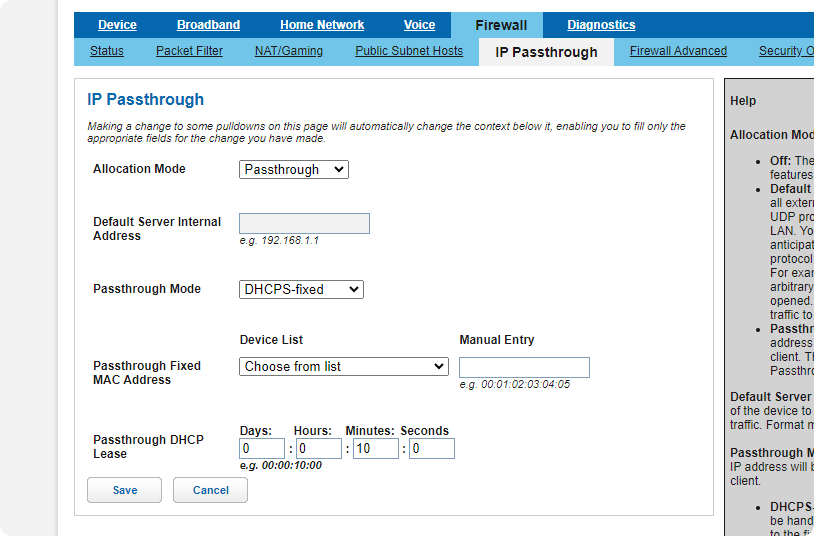
- Set the Allocation Mode to
Passthrough, and Passthrough Mode toDHCPS-fixed. (If you cannot change the following settings, make sure to press Save after selectingPassthrough)
- Fill out your third-party router’s MAC address A MAC address (Media Access Control address) is a unique identifier assigned to a network interface controller (NIC) for communication on a network or choose it from the drop-down list. Click
Savewhen you have finished.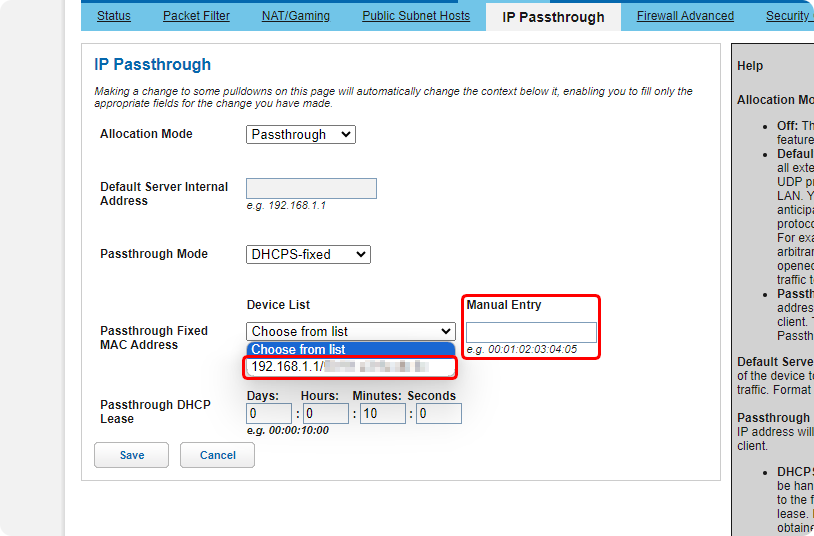
- After you save your changes, continue the process by setting up your third-party router. Given every router out there is different, I can’t provide specific steps for this part.
- One thing to note, however, is to make sure you set your third-party router’s WAN IP to the public IP assigned by AT&T (whatismyip.com can help you check this). If it’s set to
DHCP, you might get the proper IP, or you might get a private IP behind the Gateway’s NAT, which is exactly what causes double-NAT.
- One thing to note, however, is to make sure you set your third-party router’s WAN IP to the public IP assigned by AT&T (whatismyip.com can help you check this). If it’s set to
Congrats! You have successfully set up a third-party router with Passthrough on your AT&T Gateway. If you have any questions or trouble following the instructions, good luck :D
Comments powered by Disqus.